Celestial Roots
Replenishing Body and Soul
Rice fermentation, easy.
Rice is a staple food in many countries, and often there are strategies for opening up the nutritional content, and reducing the anti-nutrient qualities. Often, elimination diets call for the removal of all grains from the diet, with each grain being reintroduced separately, and any reactions noted. With all grains, I recommend reintroducing them in an activated or fermented form first, and then if no reaction is noted, in an unmodified form.
The key anti-nutrient in rice is phytic acid. Phytic acid, or phytate is the storage form of phosphorous in grains, seeds, nuts, and legumes, and has been shown to block the absorption of key minerals from foods. For example, a study published in the American Journal of Clinical Nutrition in 2003 found that phytic acid reduction in rice led to a 309% increase in iron absorption. Other minerals with poor absorption due to phytic acid are calcium, zinc, and magnesium. The mineral blocking action only applies to current intake; phytic acid doesn’t affect later meals. Mineral deficiency in meat eaters is not generally a concern if a good diet is followed, but people who eat little or no meat may develop deficiencies if a lot of unmodified grains, seeds, legumes, and nuts are eaten.
There is research existing that phytic acid may have some benefits, including an anti-cancer action, and reduction in kidney stones. That said, if the diet is already rich in functional and medicinal foods, this action is not essential, and reduction of phytic acid may be better overall. The strategies for reducing phytic acid are soaking, sprouting, and fermentation, either separately, or in any combination. Soaking, sprouting and fermentation of quinoa, for example, can reduce the phytic acid content by 98%. If you think you would like to soak and ferment your rice, read on.
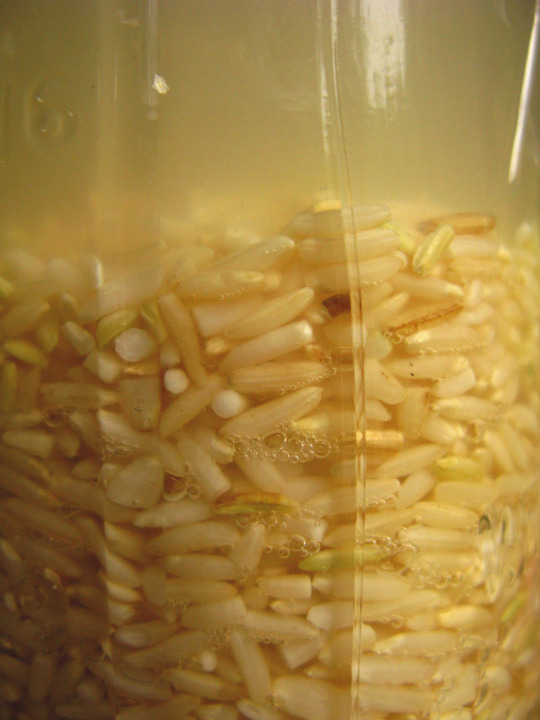
Soak brown rice for 24 hours in unchlorinated water. Drain it, reserve 10% of the soaking liquid, and keep this in a jar in the fridge. Next time you soak your rice, add the 10% of reserved soaking liquid to the new batch. Drain, reserve 10 %, keep it in the fridge, and so on. By the time you have done this 4 times or so (with four successive batches of rice), most of the phytic acid within the rice will be broken down, it will be more nutritionally open, and more digestible. Basically, each ferment builds up the level of micro-organisms in the soaking liquid, which comes into its full power after about 4 ferments. Rice is also fermented with various mould and bacteria combinations for other foods, but these involve specific cultures. There is also fermentation of cooked rice, popular in some Asian countries, which uses yeast and sometimes a little sugar. Add yeast and sugar to cooked rice; it’s done when a brownish liquid starts appearing in the bottom of the bowl.
Have you considered germinating your rice? There is a complex 24 hour method, but the easy long 2-3 day soak is best. Change the water a few times over the course of the soaking. The end of the grain will bulge and discolour as it begins to germinate. Germinated grains may then be fermented as well.
The water from soaked and fermented raw rice grains is utilised in the traditional Chinese cabbage ferment known as Suan Cai.
Primal food for any diet

Forward planning is the best way to make things quick for ourselves in those moments when we want a healthy meal in a hurry. Here is a meal that is OK with virtually every healthy diet on the planet, be it vegan, paleo, GAPS, WAPF, gluten free, or whatever (with minor variation for a raw food diet). True, this meal has potato, frowned upon by strict GAPS and paleo dieters, and if that is you, then substitute swede (rutabaga) for the potato, or even use sweet potato if you are semi-strict! For a raw diet, the sprouts could be tossed with the spinach in a dressing of tahini and lemon juice to substitute for the cooked portion.
There are two fermented foods here (forward planning numbers 1 & 2), and by now I hope everyone who visits my page has began making their own lacto-fermented vegetables. Sauerkraut and basic beets are popular and accessible fermented foods, and accompany most meals well. Sauerkraut in particular is good to have with the main protein meal of the day.
The major protein here is sprouted chick peas (forward planning number 3), and they have received only the briefest heating in the cast iron pan before serving. Firstly, onions are caramelised with a little salt added at the end to balance and enhance the natural sugar. Finely diced potato (sweet potato or swede) is added, and then browned off. Here the oil is coconut oil, just a touch, in a well seasoned cast iron pan. When the potatoes are browned, cut spinach and the chick pea sprouts are tossed in the pan for a brief acquaintance with the heat.
The most noteworthy thing about the salad greens is the blood sorrel. It’s hard to find, usually you need to grow it yourself (forward planning number 4), but it has a pleasing bitterness, and is very, very good for us! These salad greens came from the organic garden at my son’s school.
https://www.facebook.com/celestialroots
Magic is the Intelligence of Love
Fresh Cheddar Curds

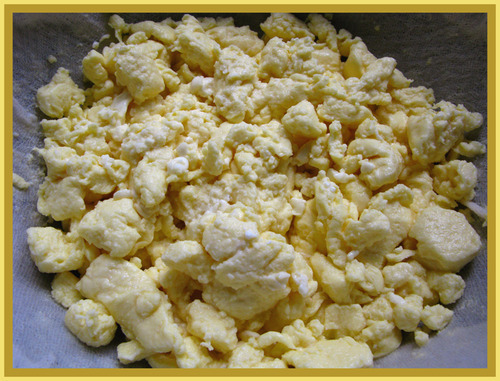
Fresh cheddar curds squeak on the teeth when bitten, have a rubbery texture, and a mild taste. When melted in the presence of other foods, they develop a unique, almost velvety consistency for a cheese, and so have the ability to lift everyday foods up to gourmet status. They are the defining ingredient of poutine, are great in tortillas or nachos, and may even be breaded and deep fried (if you deep fry them, try a little homemade cranberry sauce on the side). They are easy to make, I’ll give the recipe here for pasteurised milk, and for those lucky enough to have their own cow, the recipe for raw milk as well.
We will need a big double boiler – two slightly different sized stock pots are ideal. A stainless steel steamer basket, some stainless steel lids or a rack may be useful because the bottom of the inner pot needs to be clear of the water in the outer pot, otherwise the cheese may scald. We will need a thermometer, of the metal probe type preferably, and we will also need a knife, some cheesecloth and a colander.
Ingredients
Pasteurised milk Raw milk
4 litres (1 gal) milk 4 litres (1 gal) milk
Calcium chloride -
Culture C 201 or Cultured buttermilk
milk kefir whey
½ tsp rennet ½ tsp rennet
250 ml water 250 ml water
1-2 tsp salt 1-2 tsp salt
In using raw milk, the need to add calcium chloride is removed (its role is to repair the damage caused when milk is pasteurised). Whenever you see a cheese recipe that calls for calcium chloride, ignore this step if you are using raw milk. Likewise with the inoculation culture; a culture will either be mesophilic (likes medium temps), or thermophilic (likes warmer temps). Where a thermophilic culture is called for, use kefir milk or whey; and where a mesophilic culture is called for (as in Feta making), use cultured buttermilk. Because cheddar cheese cultures (eg C-201) are thermophilic, but the curd making procedure uses only moderately warm
temperatures, a little milk fat left in the buttermilk will produce a suitable
culture for raw milk if left in a covered jar on the bench for 3 days or so. Specific cultures are useful to imitate a desired cheese, but there is also nothing wrong with creating our own local version of these cheeses, using the organisms native to milk, kefir, and our local environment.
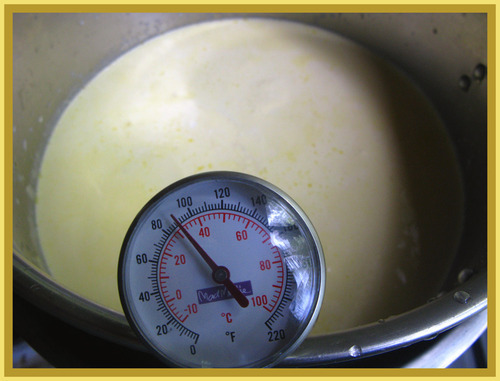
First step is to put the milk in the double boiler, and bring it up to 32° C (90° F). At this point, add the calcium chloride if using, annatto (optional colouring) if using, and your culture source. Maintain this heat for 30 minutes.
To colour the curds, annatto is often used (annatto is a plant extract that is harmless and serves only to colour), but the best way to get colour is to buy milk from pasture raised cows. Cheese and butter from pasture raised cows is yellow, and while vitamin K2 isn’t yellow, seeing naturally yellow dairy products indicates high levels because K2 is obtained by cows from fresh green grass. It is possible more and more these days to find milk at the store labelled “from pasture raised cows”, or even “pasture raised Jersey cows”. The protein (casein) from Jersey and Guernsey cows is more easily metabolised by the human body.
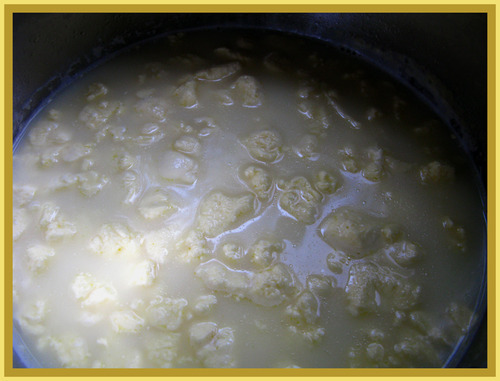
Step two is add the rennet. Rennet curdles the warmed milk, and lemon juice can often be used to the same end. We are using rennet here though, as it is a no fail method of curdling, and we are talking about 4 litres of prime milk! Lacto-vegetarians can purchase non-animal rennet, or the juice of half a lemon may be used. Stir the rennet into the room temperature cup of water and run over the back of a wooden spoon covering as much of the surface as possible. Stir for 30 seconds with the spoon, first pushing up and down over the entire surface to mix the rennet vertically, and then stir normally. Maintain the temperature for 30 minutes, then check for what cheese makers call a ‘clean break’. Run a knife along the edge of the pot. The milk should have separated into one coherent mass floating in a pool of whey. If the mass separates cleanly from the side of the pot, it is ready. If you make a cut with the knife and the mass separates, and fills with a clear liquid it is ready. If the liquid either between the mass and the pot or within the cut is cloudy, wait a few minutes more.

Once we have a clean break, slice the mass of milk solids into 2 cm (¾ inch) cubes. With 4 litres of milk, we will need to perform a series of cuts at a 45° angle to ensure a small size on the entire vertical plane (to the very bottom of the pot). Don’t worry about getting a whole pot full of perfect little 2 cm cubes, this is not going to happen. We just do the best we can, and our curds will break apart from these cubes as we stir. Which we will do now, for five minutes or so.
After cutting the curd and stirring to start the breaking apart process, step four involves a slow raising of the temperature to 40° C (104° F). Stir occasionally, and heat anywhere up to 90 minutes in this step. The longer the heating, the drier the curds will be. Lift the curds out on a spoon to see the progress, and we can call this step finished when they look the way we want them to.
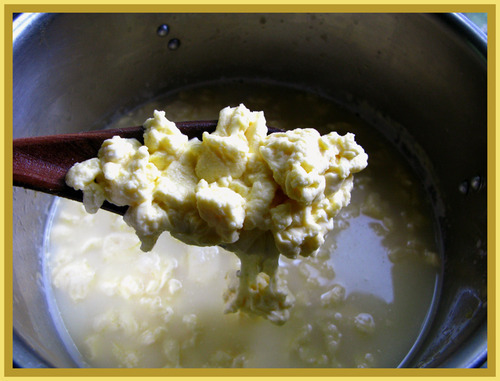
Next step is to drain the curds. Place some cheesecloth inside a colander and pour the curds and whey into it. We are left with a mass of wet, uneven curds which we want to press for a few hours. Wrap the cheesecloth tightly around the curds, and fold the ends under. Place a bit of wood or a plate on top of the cloth-wrapped curds, then fill a big jar with water, and sit this on top. Once pressed, we are left with curds that are dry, just like those in the very first photo. Put the curds in a bowl, and sprinkle some salt over them Pour off any excess whey, then store in glass in the fridge.
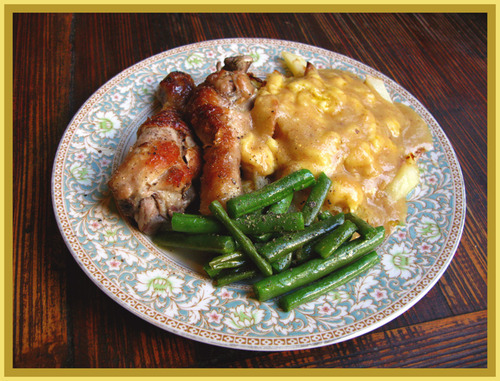
After that, use them any way you like, but do so within four days. These curds are at the height of their powers straight away, so plan a meal for the time they’ll be ready! We had free range organic chicken drumsticks, pan fried in butter, then cooked in a casserole with gelatine rich turkey stock. The pan juices were used to make a gravy – 1:1 butter/chicken fat:chick pea flour, with gelatine rich turkey stock added until the desired consistency. Green beans were fried lightly in butter, and organic Sebago potatoes were made into chips (aka French fries). The chips are put on the plate, the curds are broken up small and place on the hot chips, then the hot gravy is poured over. The dish of potato chips, fresh cheddar curds and gravy is called poutine, a speciality of Quebec, which is a place I love (but not just for the poutine).
https://www.facebook.com/celestialroots
http://www.celestialroots.com/
Magic is the Intelligence of Love
Sprouting 101
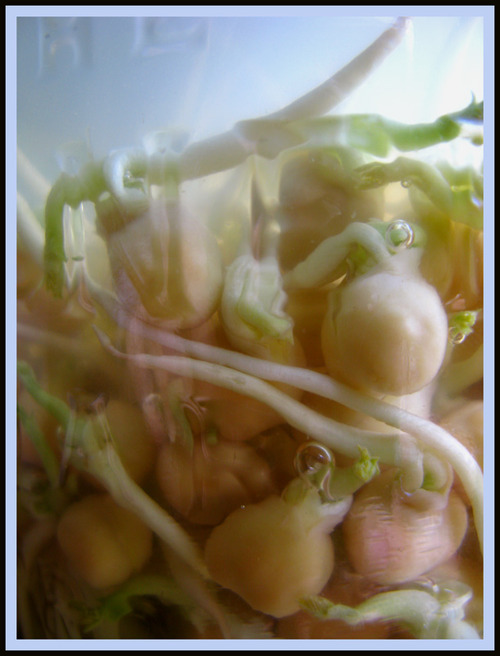
Sprouting, fermenting, and activation by soaking are great strategies for enhancing the nutritional qualities of beans, seeds, grains and nuts, as well as neutralising the anti-nutrient and gas-forming components. Chick peas (garbanzo beans) are easy to sprout, let’s look at them.
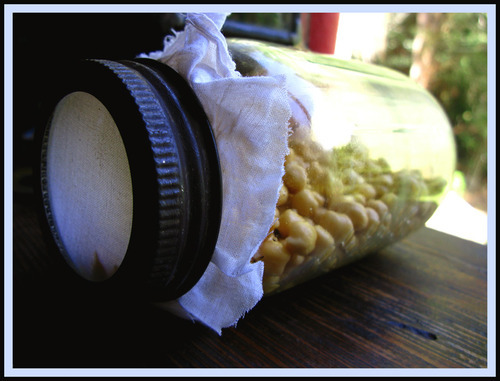
Rinse an amount of chick peas, then fill a jar to about a third with peas, then fill to ¾ with pure water. Leave to soak for between 8 – 24 hours. Drain, and then put back in the jar. The jar will need to be laid on its side in the dark, so a piece of cloth needs to be secured across the entrance. Lay the jar on its side in the dark, and every 8 hours or so, rinse and drain quickly, then replace. The peas will start to sprout anywhere from 12 to 24 hours after this. Once they sprout, they need another two or three days until the tails are as long as the beans, or longer. This is when they are ready. I generally give them a little time in the dark, then the rest in indirect light so they develop chlorophyll.
Once well sprouted, the nutritional value of the chickpeas may also be further enhanced by fermentation. Simply place the peas in a jar of water, add a touch of salt (or some sauerkraut juice), and leave from 2 – 5 days.
To activate nuts, soak them first, and then dry them thoroughly either in the sun, or in a food dehydrator. Ensure they are completely dry before storing in a clean, airtight jar, otherwise they will mould. Not maybe, definitely.
http://www.celestialroots.com/
https://www.facebook.com/celestialroots
https://ello.co/celestialroots
magic is the intelligence of love
Fluffy falafel and the GF flatbreads
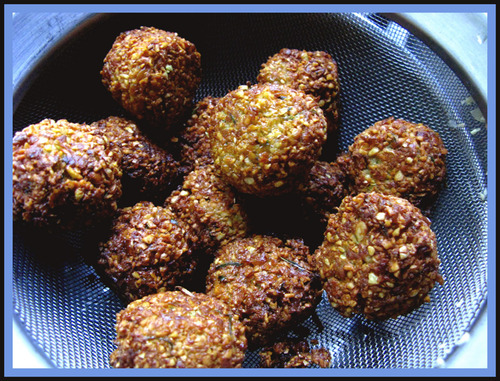
No, not a vegetarian punk band, just a chance for us all to renew our love affair with Middle Eastern food. These falafel are light and fluffy on the inside and all crispy and dark on the outside. The gluten free flatbreads rock as well. But don’t just take my word for it …
Sprouted chickpea falafel
2 cups of sprouted chickpeas
½ an onion
4 cloves of garlic
Thumbnail sized piece of turmeric root, diced and lightly fried in oil
Small handful of coriander leaf (cilantro) or parsley
1 tsp cumin powder
1 tsp coriander powder
¼ tsp cayenne pepper
2 tbsp chickpea flour
Place all ingredients in a food processor and blend to a thick paste. It wants to be smooth enough to stick together when forced, but not so smooth it becomes hummus. Place this in a bowl, cover with a small plate and refrigerate for a minimum of one hour.
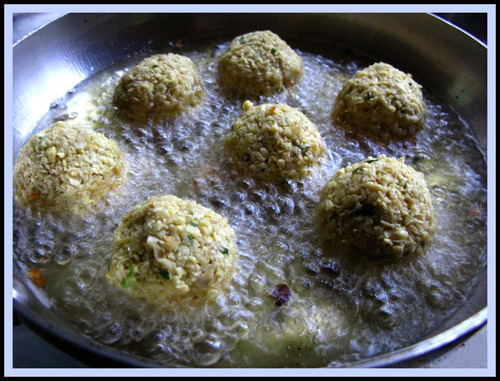
Take the mix and form into balls. If they won’t hold, add a little more chickpea flour and maybe a touch of water. If you are really having problems, add an egg, but these will be loose and bind together with the cooking, so have faith and a delicate hand. Fill a high sided frying pan with oil so it comes half way up the side of your falafel. Bring to a high medium heat (not too hot), and cook each ball for a few minutes, until you see they are browned well on the bottom. Turn them over and give them the same treatment, then put them out on paper towel.
Always use an oil with a high smoking point to avoid production of toxins. We like to use coconut oil in our house, but rice bran oil is a good substitute. For health and environmental reasons, we never use canola oil, and recommend everyone do the same. Using coconut oil to fry is expensive when it is purchased by the 500 ml jar, but we get around that by buying it wholesale in 20 litre drums.
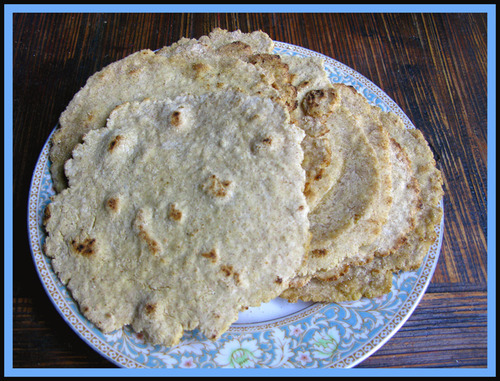
Gluten free flatbread
1 cup millet flour
½ cup sorghum flour
½ cup chickpea flour
½ potato flour
½ cup tapioca starch
1 tsp salt
1 tsp psyllium husk
1 egg
2 tbsp olive oil
½ cup water
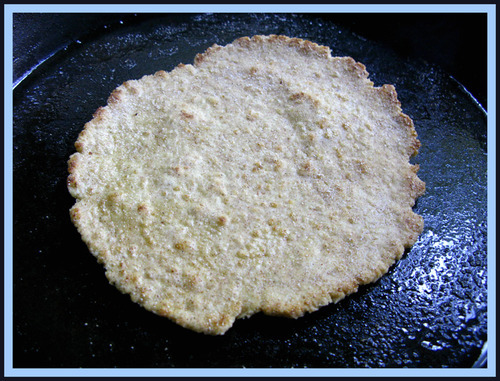
Mix all the dry stuff together in a bowl, then add the wet stuff. Form into a dough, then divide into half, then again twice until you have 8 balls. They will roll out easily on a lightly floured board into thin rounds. Heat a cast iron pan, and add ½ tsp of olive oil to the pan for each flatbread cooked. If you get the heat just right, they will separate in the middle to form a pocket, but I prefer just laying the filling in the centre and folding the edges together to make a half moon.
We served these with a salad of sliced spring onion, grated carrot and grated beetroot, with a thick sauce made from tahini, apple cider vinegar, olive oil, salt and lemon juice.
https://www.facebook.com/celestialroots
http://www.celestialroots.com/
https://ello.co/celestialroots
magic is the intelligence of love
Thai fish soup

Thai fish soup
This soup has a base of snapper frame and head broth, to which is added coconut, the usual Thai spices and herbs, my version of crispy seaweed, thick rice noodles, and salted swordfish cooked in a cast iron pan. Fish broth has a host of health benefits including high bioavailable mineral levels, substances to strengthen and repair connective tissues, good oils, and thyroid hormones. It is also very healing for the gut. This soup is a real treat, and it will go some way to redressing the damage caused by intake of factory farmed foods, hypothyroidism, and induced auto-immune conditions.
Ingredients
1 fresh large snapper frame (gutted, filleted, head on, thyroid gland on)
1 large swordfish steak
1 pack of pad Thai noodles
200 ml of coconut cream
6 kaffir lime leaves
Galangal root, 3 slices dried (or 1 tbsp powdered, or 2 tbsp fresh grated)
Fish sauce, to taste
Soy sauce, to taste
½ cup sweet potato julienned
½ cup carrot julienned
½ cup zucchini julienned
Thai coriander to garnish
Lime juice, to taste
1 onion, sliced
1 spring onion, cut on the diagonal
1 tbsp tamarind paste
Diced fresh chilli to garnish
Red cabbage, shredded
Wakame, shredded
Sesame seeds
Some coconut oil
Some salt, rock or good crystal
Cracked black pepper
The broth
Cut up the frame, add to water, add a dash of apple cider vinegar and cook on a low heat for an hour and a half. Take a heavy wooden spoon and smash the carcass and head as completely as you can. Add a few tsp of salt and continue to cook for another hour and a half. Strain, reserving the liquid, which is our soup base.
The soup
Add the broth to a large pot, then add the galangal, lime leaves, fish sauce and soy sauce. Heat gently, adding the onion and sweet potato. Let cook for 30 mins, then add the spring onion and carrot, and 5 mins after, the zucchini. Cook a wee bit more, then add the coconut milk and tamrind. Adjust fish and soy sauces to taste.
The crispy seaweed
Add first the cabbage to a hot pan with the coconut oil. Cook until getting a bit crisp, then add the wakame. Cook until the cabbage is really crisp, then add the sesame seed and cook for a little more. Place in a bowl and allow to cool.
The noodles
Cook as per instructions, most usually this means 6-8 mins in boiling water. Drain and place in warmed bowls.
The swordfish
Cook the steak whole on a very hot, seasoned cast iron frying pan with no oil. Sprinkle the salt and black pepper on the top. Cook until it is coloured to the halfway mark, then turn. Cover the other side with salt and pepper, cook until the colour reaches the middle. Cut into chunks, then quickly toss in the pan, then remove to a warmed plate.
To serve
Cover the noodles with the soup. The sweet potato will mostly have dissolved to thicken and sweeten the soup. Place the swordfish on top, then the chopped Thai coriander, crispy seaweed, and diced chilli. Squeeze a bit of lime juice over it, and serve.
https://www.facebook.com/celestialroots
https://ello.co/celestialroots
http://www.celestialroots.com/
magic is the intelligence of love
Gluten Free Millet Loaf
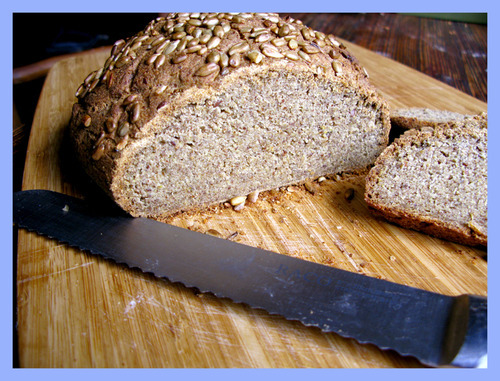
Anyone who is even a little clued up about their health can’t help but do a little double-take when reading the ingredients in store-bought gluten free bread. Canola oil, soy flour, gums of various sorts, preservatives, fixatives, stabilisers, way too much sugar, etc. And even after all that, it still either tastes like crap or cake.
Despair not! This is a 100% healthy, vegan, gluten free bread that slices like a dream, doesn’t crumble, and tastes like a bread made from gluten-bearing grains. Now that is a pretty big call, but why don’t you just try this awesome bread and make your own mind up. As a clue to how good it is, our 6 year old boy can’t get enough of it. I gave someone at my local wholefoods shop a taste, and they asked me to make them one regularly, no matter what the cost.
So, what are you waiting for?
Gluten free millet loaf
2 cups warm water (30-35° C)
2 tbsp milk kefir whey (optional)
2 tbsp raw sugar
1 tbsp yeast
½ cup ground chia seed
½ cup ground flax seed
3 tbsp olive oil
2 tsp apple cider vinegar (optional)
2 ½ cups millet flour
1 cup sorghum flour
½ cup corn flour
¼ cup rice flour
¼ cup quinoa flour
1 tbsp tapioca starch
1 ½ tsp salt
1 tsp baking powder
Add 1 tbsp sugar, the yeast and whey (if using) to the water in a four cup jug or bowl, stir and let sit for 10-15 minutes in a warm spot until it is bubbly and alive.
Mix the flours and salt in a bowl, then set aside. When the yeast has risen, add the oil, the other tbsp of sugar, the vinegar (if using), and the ground flax and chia seeds to the yeast mixture. Let this sit for no more than five minutes, then mix into the flour. The dough wants to be a little on the sticky side. Knead it for a few minutes, then place in a small bowl that will accommodate a doubling of size. Place in a warm spot to rise – 1 hour for warm conditions, 2 hours or so if it is cool.
Take the risen dough and knead on a floured board for a minute or so, then form into a ball and place on an oiled baking tray. Score the surface, and if desired, spritz with water and sprinkle seeds on the top. Let rise for a further 30 – 60 minutes.
Preheat the oven to 205° C (about 400° F), and bake for 45 minutes. A bowl or tray of water placed in the oven will help, as will spritzing the top with water. Take out of the oven and place on a wire rack. Let cool for half an hour before slicing.
Magic is the Intelligence of Love
Ebola - don't feed the fear!

The Ebola virus (or more correctly, viruses - there are more than one) is on everyone’s mind lately, and sensationalised reporting in the media is largely responsible for this. Add to this the recent stories of zombie-looking African men rising from supposed Ebola death, which ties in nicely to the ongoing zombie apocalypse theme, and it’s easy to see why the collective mind is largely consumed with fear. Ebola, the zombie thriller-killer, cue Michael Jackson’s apocalyptic dance routine. But what can we do to beat it?
I will talk later about natural remedies and prophylactics for Ebola infection, but first, we need to relax. We should all be taking steps to relax for the good of our general health, but here, we need to look at the situation rationally, free from the hype of fear. Ebola outbreaks occur in places that differ vastly from our relatively safe Western environments. These places have poor sanitation by our standards, and often crushing poverty that prevents optimal nutrition. On top of poor sanitation and diet, these are regions that have known long standing political turmoil, so many people there live lives of constant stress and trauma. These are the conditions in which a pathogen may become firmly established within the host. While it is true that Ebola is a unique and virulent pathogen, and the human body has had as of yet no time to adjust to it, the chances of a massive outbreak in a Western nation are fairly small given our relatively better hygiene, diet, and stress levels. Primarily, we should not give in to fear, because a state of fear seriously disables our immune system.
So we see that our first line of defence is a good, strong immune system within a sound and well nourished body. To this end, a diet free of processed and refined foods is essential. Reducing known allergens is important, as is maintaining a healthy balanced within our internal ecosystem of microorganisms. This means fermented foods, taken regularly as a condiment to the main protein meal of the day. Fermented tonic beverages may also be consumed in moderation. We want to be eating a lot of fresh green vegetables, and carefully chosen fruits (in moderation, to limit our total sugar intake, which will work against what we are trying to achieve). Basically, any of the diets around that emphasise natural food and fermented foods, such as Paleo, GAPS, WAPF or vegan, to name the a few of the better known ones.
So, what are the natural ways we can protect ourselves? Scientific research and my own understanding of plant and food medicines indicate that the following are of benefit against Ebola: High intake of bioavailable vitamin C; the phytoestrogen genistein, found in fermented soy foods, fava beans, kudzu, coffee, lupins of all kinds, the Ayurvedic and Chinese medicinal plant Psoralea corylifolia, the Southeast Asian medicinal plants Flemingia vestita and F. Macrophylla, and red clover; lemon myrtle leaf as both a tea and a body wash; bracken fern beer; the primary estrogenic hormone 17β-estradiol (estradiol); the bitter cola nut (Garcinia kola); and the homeopathic remedies Sicarius and Ledum.
Genistein is clinically proven to work through two mechanisms: it interferes with the mechanism by which a cell takes in a virus, and with the virus’ ability to alter cell membrane proteins to gain entry. Genistein is structurally similar to estrogen (estradiol), which also has been found effective against Ebola, so it stands to reason that women of childbearing age with a healthy hormonal system are to some extent naturally protect. This would most likely hold true of natural or pharmaceutical hormone replacement therapies as well. The benefit of genistein is that it appears to interfere with the male hormonal system much less than estrogen does. In general, everyone, but males especially need to be mindful about introducing female sex hormones or their analogues into the system. Consumption of genistein containing foods then should be regular, but not overdone. Use it in concert with the other measures discussed here.
Symptoms of Ebola sickness resemble in many ways the course of acute scurvy. Dr Robert Cathcart, a specialist in treating virulent infections with high doses of vitamin C was of the opinion that Ebola kills via free radicals. So as well as copious vitamin C, any dietary measure that deals with free radicals may well act as a prophylactic against Ebola. Bear in mind that vitamin C from food sources is much more bioavailable that in supplement form. Also worth noting is that fermentation of vitamin C containing vegetables preserves the vitamin content, and improves its bioavailability. Fermented foods also contain valuable pro-biotic organisms, and pre-biotic compounds (compounds that give a competitive advantage to pro-biotics). The best fermented food in relation to this discussion would in my opinion be sauerkraut. For the phytoestrogen genistein, tempeh and natto would be my preferred ferments.
In closing, the best defence against any infection is our own body. Eat well, reduce exposure to electro-magnetic radiation of all kinds as much as possible, engage in practices that promote relaxation, and do not give in to fear. If we live in constant fear that we will die from Ebola, then we are half dead already.
A few weeks after I wrote this, renowned herbalist Stephen Guhner published his take on Ebola on his facebook page …
“A BRIEF LOOK AT EBOLA – STEPHEN BUHNER
In the fall of 2014, for the first time, ebola broke out of the African nations and reached (via airplane, as epidemiologists had long predicted it would) the United States, I began receiving scores of emails asking for some deeper information regarding herbal approaches to help prevent and treat the condition. This is a brief exploration to address those concerns.
The virus and its effects really does need an in-depth treatment, especially going into its nature and function as I do in the coinfection books. I would like to, as well, to cite all the journal articles I used, as I did in those books, but so many people are asking (and I have so little time and certainly none to do an entire book on the virus) that I am just posting the pertinent information here. Much of this will go into the Herbal Antiviral book during an upcoming reprint but due to space limitations I am not sure how much. This protocol should do a lot to help prevent or reduce infection and, if necessary, help combat the septic shock that occurs in the later stages of the disease.
There are four species of ebola that can cause human disease; the virus responsible for the 2014 outbreak is (Zaire ebolavirus species) which causes anywhere from a 40% to a 90% mortality rate. The virus is highly virulent and actively subverts both the innate and adaptive immune responses. Although up to half of those infected are able to mount an immune defense, in the rest the virus so subverts the immune response it progresses to an acute hemorrhagic fever which is often fatal. This group of viruses is relatively new to human science, the first identification occurring in 1976 during an outbreak in Zaire.
Infection generally occurs from direct contact with infected bodily fluids such as blood or the vomit and diarrhea that often occur with the disease. Infection through direct skin contact with an infected person or through contact with blankets the infected have used has also been documented but is much less common. There is some concern among virologists that the disease could mutate to an infectious airborne type; it has not been documented so far.
As with most viruses, onset is flu-like with the usual fever, chills, and so on, generally after a 4-10 day incubation period. A rash often appears around day five which is the only way to differentiate it, in its early stages, from the flu. Generally, the liver, spleen, kidneys, adrenals, and endothelial structures are heavily infected, often leading to organ necrosis and failure. During fatal infections the endothelial structures of the vascular system fail with accompanying blood loss. The virus inhibits and modulates the immune response, ultimately producing a powerful cytokine storm, leading to septic shock. The latter stages of the infection are, in fact, nearly identical to the 1918 flu (see The Herbal Antiviral book for more on this).
The primary cytokines that increase during severe and fatal infections are IL-1b, IL-6, IL-8, IL-10, IL-15 and 16, and MIP-1beta; interferon-a levels are severely reduced as is IL-2 through 5, IL-9, IL-13 and a severe drop of both CD+3CD4+ and CD3+Cd8+ peripheral cells. Those who successfully recover show the opposite profile, hence decreasing those cytokines and increasing IFN-a and other reduced cytokines is crucial.
Protecting the affected organs, reducing the cytokine cascade, and enhancing immune function are essential. A number of substances has been found useful for interfering with viral penetration and replication as well as protecting the affected organs and modulating the ebola effects on the immune system.
(Please note the following dosage guidelines are, at the lower end, protective, at the higher end, for use during early infection. Long term use of these amounts is contraindicated.)The suggested protocol is:
* General antiviral formulation: Isatis, Baikal skullcap root, licorice, equal parts of the tinctures, 1 tablespoon 3-6x daily. Broad spectrum antiviral combination, skullcap and licorice are synergists, licorice enhances IFN-a production, all acts in various ways to reduce ebola cytokines.
* Elder tincture: Needs to be produced from stem, leaf, and berries as outlined in this book. Dose to bowel tolerance, from ¼ tsp to 1 tbl 3-6x daily.
* Genistein powder, 1 teaspoon 3-6x daily. Inhibits both infection with the virus and transduction in infected cells.
* Milk Thistle Seed, standardized capsules, 2500 mg 3-6x daily. Protects the liver and contains compounds that reduce viral replication and penetration of cells.
* Salvia miltiorrhizae (red sage) tincture, 1 tablespoon tincture 3-6x daily. Protects the spleen, enhances immune function, reduces cytokine cascade.
* Japanese knotweed root (Polygonum cuspidatum), 1 tablespoon of powder or tincture 3-6x daily. Protects endothelial cell integrity, reduces cytokine cascade.
TO REDUCE CYTOKINE STORM/SEPTIC SHOCK (all tinctures)
1) Angelica sinensis/Astragalus spp, equal parts, 1 tbl each hour
2) Salvia miltiorrhiza, 1 tbl each hour
3) Pueria lobata/Cordyceps, equal parts, 1 tbl each hour
4) Glycyrrhiza (licorice)/Bailak skullcap, equal parts, 1 tbl each hour
Note: this has been found in vivo to stop exactly this kind of septic shock.”
For information on diet and especially fermented foods, go to my page below.
Gundruk - Nepalese fermented greens
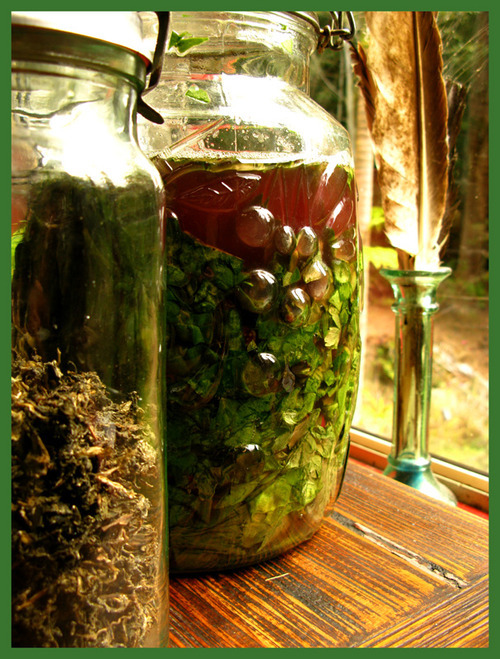
Gundruk is a traditional vegetable preservation technique from Nepal. Nepal, as we all know, is high in the Himalayas, and in this environment there are long periods where no fresh green vegetables are available. Fermentation of vegetable greens, those parts that we in the west often throw away (or at least hopefully turn into compost), ensures a steady supply of essential vitamins and minerals when no fresh food is available, and the fermentation process not only preserves and makes these nutrients more bio-available, but also produces enzymes and amino acids that aid digestion and assimilation of food.
Of the 69 different cultural and linguistic groups in Nepal, the most well known to Westerners are the ethnic Tibetan Sherpa in the north, and the ethnic Indo-Aryan Ghurkha in the south, and both these peoples are known for their strength, endurance and bravery. To that list, we may now add that these peoples historically relied upon Gundruk (and the related radish root ferment Sinki) to get them through the toughest parts of the yearly cycle. When the British army relied on Ghurkha warriors to get them out of a tight spot, and when Tenzing Norgay took a stroll up Mount Everest with Edmund Hillary, you can bet that gundruk was there too, tucked away in a corner of each backpack.
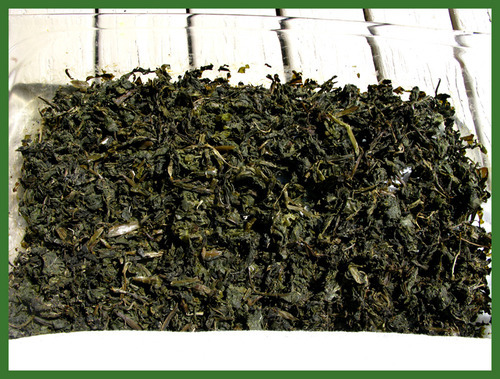
Gundruk is simple. Take the green parts of a variety of vegetables. Anything in the cruciferous vegetable group is traditional (e.g. kale, mizuna, and other radish greens), and we can extend this to include collard greens, broccoli greens, beet greens, spinach, and celery leaves. Any robust and edible green leaf is suitable. Remove any thick stems, and wilt the greens in an airy container placed in a warm and airy location. Wilt the leaves for 2 days. Chopped the leaves roughly with scissors or a knife, pack them as tightly as you can into a glass or ceramic vessel, then top the vessel with pure water heated to about 30° C (86° F) and leave for 5 days to a week. A little salt may be added to the water, but this isn’t necessary.
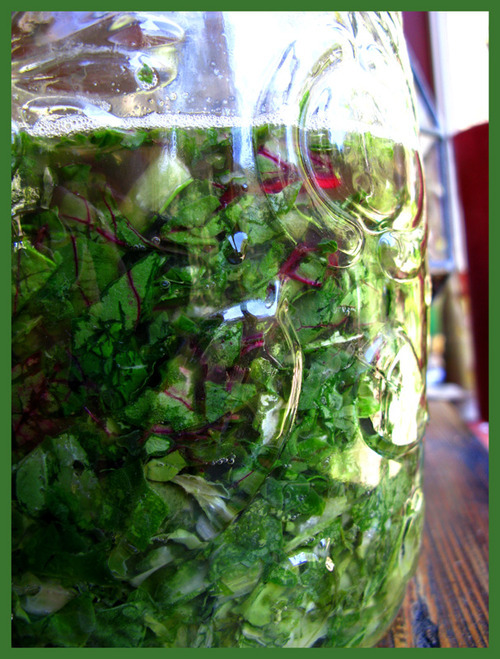
After 5 days or so, drain the greens well. The water may be utilised in a soup, if we wish. There is plenty of goodness in it, it would seem a shame to waste it.
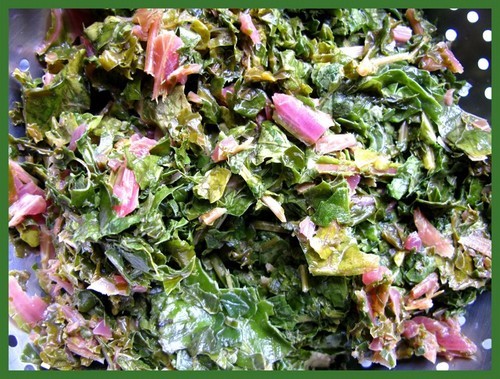
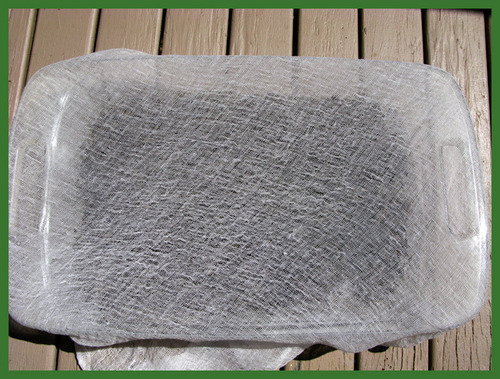
Place the drained greens in a tray or similar, and spread them out as thinly as possible.
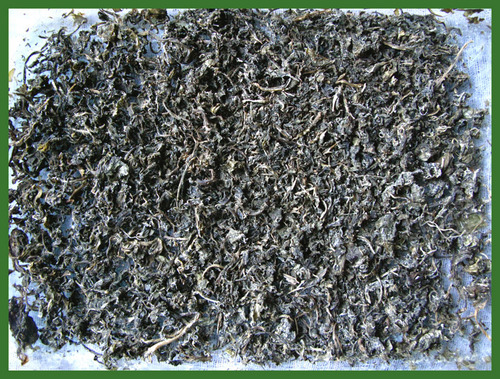
Cover the tray with an airy cloth to keep insects away, and dry in the sun.
The next step will take as long as it takes. It will be quick if the weather is nice and hot, it will take possibly a few days if the weather is cool. Ensure adequate ventilation at all times, and this stage is only complete when the vegetable matter is bone dry. This is when it has become gundruk, which may be stored in a container for a year or more without mould developing.
What do we do with this? Add it to soups and stews, just as the Nepalese do!
Gundruk and Rice
1 onion, chopped
1 – 6 dried chillies, amount to taste
1 firm mango, chopped (substitute tomato)
2 tsp turmeric powder
1 tsp salt
Some curry leaves
Coconut oil or Ghee
2 cups water
Soak the gundruk in water for 5 – 10 minutes, then drain. Fry the onion and chilli in the oil, then add the turmeric, then the curry leaves, then the mango, then finally the salt, stirring well for 30 seconds after each addition. Add the water and the gundruk, and simmer for 10 minutes or so, until thickened. Serve with rice and lime pickle.
As soon as the fermenting vessel is emptied, fill it with more greens for more gundruk. Do this continually through the growing season to avoid having to buy imported green vegetables from a different hemisphere in the off season. It is best to eat food from our own region where possible because we are more in tune with it energetically, and reducing the long distance transportation of food is an environmentally sound practice.
https://www.facebook.com/celestialroots
Magic is the Intelligence of Love